Hi, I am having some problems with text alignment, I need to design a menu but the alignment online looks different than the preview…
Any ideas?
Thank you!
Hi, I am having some problems with text alignment, I need to design a menu but the alignment online looks different than the preview…
Any ideas?
Thank you!
This is something I’ve come across and it seems it stems from the line spacing and text emboldening. Where you have multi-line descriptions, the alignment of the menu item text box and the price text box can start to go out of sync. This was more to do with the way I constructed the menu. essentially, I created two side by side text boxes one for all the descriptions and one for all the prices. This doesn’t work well so I solved the issue by making individual text boxes for each description and price and aligned them all manually. It’s a bit tedious on a large menu, but it does work well. Alternatively, You could use an online table generator to create a table layout and add it to the page with a code widget.
@andredupke (just noticed when posting that @francbrowne replied in the same vein!)
It looks like you have used spaces between the menu item and its price to align the prices on the right. This is why where the item names are short the price is more to the left. Using spaces to align items only works when using a monospaced font.
Normally, this sort of thing is done using tables, which can be a right pain where responsive design is concerned, And Sparkle does not have them.
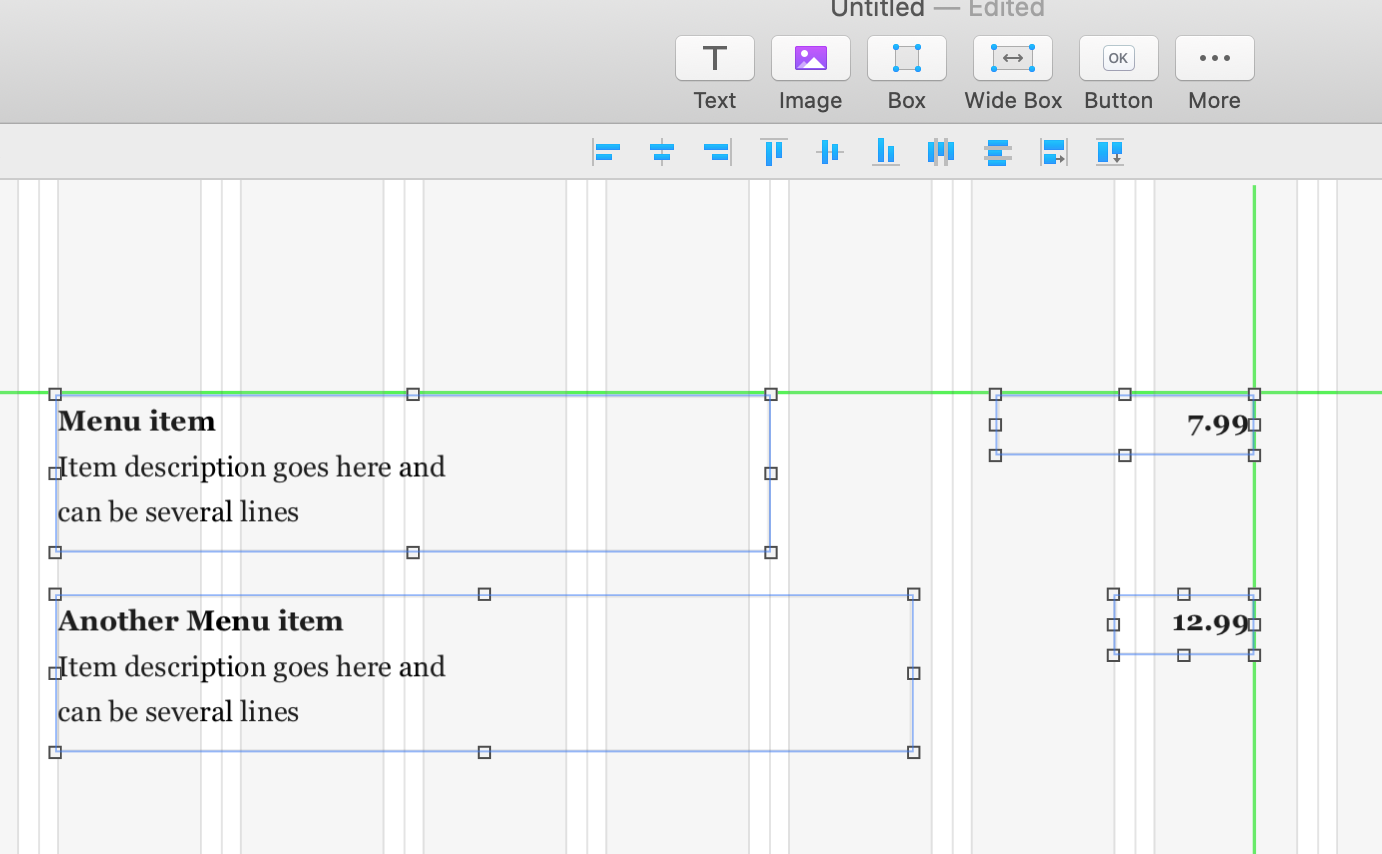
If you separate the menu items into individual text boxes then you can use Sparkle’s alignment tools to keep everything lined up.
In the example above, the text in the price box is right aligned and the boxes themselves are aligned to their right sides. The Menu item and its price have their top edges aligned. Note the text boxes do not have to be the same size.
Furthermore, if you group each item and its price you can use the distribution buttons to lay out the whole menu.
However, if you are regularly updating the menu this type of layout is hard to maintain and you might like to consider embedding a PDF! Others on the forum will I’m sure be able to offer other solutions.
Thank you!
That will work! 
On your Mac, iPhone, and iPad you have, or can download free from the App Store, Apple Keynote, Pages, and Numbers. All will work, but Numbers is most appropriate here, use whatever is most familiar.
In your chosen Apple app, create a table the width of the largest device canvas you will be using in Sparkle. If you know how many menu items you’ll have you can create that number of rows. Turn off background fill for all table cells while leaving the cell borders intact for now. Copy the table and paste on the Sparkle canvas of the widest device. What you have now is a .png grid with transparency. Keep your Apple application with the table open, you are not done here yet.
The concept here is you are going to use Sparkle’s tools to “fill” or place over each cell space your media such as text and images. Line up the text and other media place holders with the table’s cell outlines. Then overlap your text and media box edges to cover the cell borders. Format your text and images just as you would normally.
Now if you are aligning your menu items and prices on the left and right edges of the viewing area, you won’t need the cell borders in the middle. Go back to the table in your Apple app and turn off the cell borders for the cells you are not using. Copy the revised table and go back to Sparkle. In Sparkle highlight the existing table and delete. Paste the revised table, line it up with your text and images and send the table to the back.
Get more creative with your menu design. You can add text that expands beyond the initial box by adding scrolling. Enable menu images to be enlarged in a lightbox. Add audio. Even add a GIF or short movie describing a menu item.
Once you have it just right, group everything and move it around and apply affects/animations to the group or individual items. By the way, when everything is grouped, just double click on an individual item to make changes without affecting the group overall.
No tool should interrupt your imagination. Utilize the cumulative strength of each of your tools to maximize your creative workflow.